Monday, December 02, 2013

20% Off in the Etsy Shop for Cyber Monday!

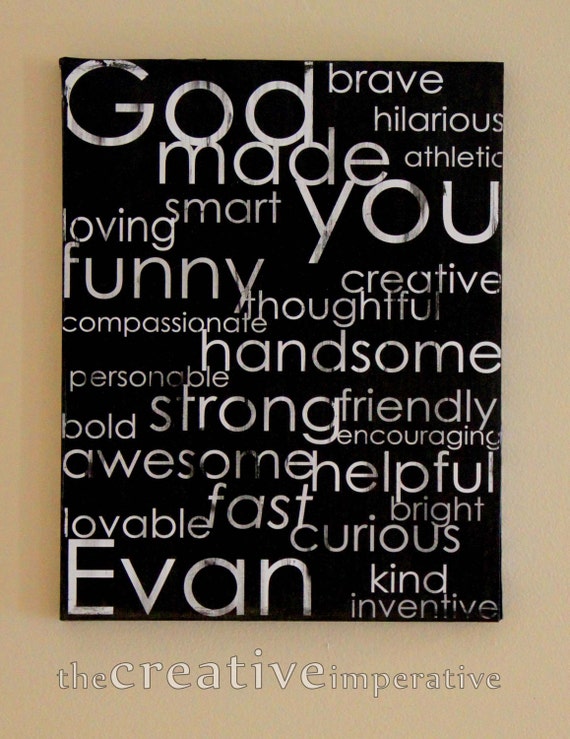
Hi friends!  It is my favorite time of year... I get to start using my Christmas wrap for the etsy canvas orders.


It's kind of like when the red Starbucks cups start showing up... it just gets me in the holiday spirit!

We have a deal in the etsy shop today... 20% all items for Cyber Monday!  That includes canvases


and digital designs so you can make your own print or canvas.

Just enter BLESSED in the box for the coupon code and your order will be discounted 20%.

Here is one more link to the shop!

Thanks so much for your support!
Blessings,
Jamie


Monday, August 05, 2013

Unique Wedding or Anniversary Gift: Song Lyric Prints in the Etsy Shop

There is a new item in The Creative Imperative etsy shop.  I recently made this print for a friend; she was going to a wedding and was looking for a unique gift.  I made this one into a canvas; I am only offering them as prints in the shop right now though.


Here is one that I designed for another couple


and if you're looking for a bolder style, here are the same words in a different layout


Be sure to check out the Custom Wedding Song Lyric Print Listing if you're interested.  It comes in 11" x 14" or 16" x 20" and they are completely customized to your specifications (words, colors and style).

This makes a great wedding gift or anniversary gift!

Thanks so much for stopping by; let me know what you think in the comments.
Blessings,
Jamie 

Thursday, August 01, 2013

A Bathroom Update: The Chartreuse Outhouse

We recently updated our powder room.  I am starting to feel like our house is a little too serious so I thought I'd try something a little more playful in the bathroom


There is zero natural light in the bathroom... sorry for all the harsh shadows!  I had an idea to make a faux outhouse door out of some old pallet wood.


I just used nails to hold the whole thing together and then painted the moon and star on it.


I used to be a big Phish fan; the inspiration came from their Farmhouse album cover.


I really love it, I wish it gave off a little more light though.  My husband was joking about the overall look we were going for in the bathroom... he calls this style "industrial outhouse".  Maybe it's a trend that will catch on!

The whole look is a little bold and took some getting used to, but I really like it now.  I found the cutest hooks at Hobby Lobby; they were only a little over $2 with the 40% off coupon.


I made little loops from ribbon to help the towels stay on the hooks.  It just helps a lot when there are little kids using the towels regularly.  The tutorial for that can be found here.

What do you think?  Too bold?  Too "outhouse"?  Thanks so much for stopping by!

Blessings,
Jamie
This post is linked here:  Today's Creative Blog Blue Cricket Design Kurtz Corner Mommy by Day Crafter by Night Cherished Bliss Lines Across My Face Southern Lovely Bear Rabbit Bear French Country Cottage Craft Junkie Too DIY Home Sweet Home Saved by Love Domestically Speaking Funky Junk Interiors Homemaker on a Dime Eisy Morgan The Answer is Chocolate Making the World Cuter Craft-O-Maniac lolly jane 504 Main I Heart Naptime Singing Three Little Birds mad in crafts House of Hepworths Somewhat Simple Chic on a Shoestring Keeping it Simple Be Different Act Normal Sew Can Do Sew Chatty Pinkapotamus The Girl Creative Flamingo Toes Tatertots and Jello Sisters of the Wild West Reasons to Skip the Housework Giggles Glitz and Glam Tip JunkieThe Trendy Treehouse Ladybug Blessings Night Owl Crafting Tea Rose Home My Girlish Whims Allie Makes Gluesticks Thrifty 101 Momnivores Dilemma A Little Knick Knack Miss Mustard Seed Freckled Laundry kojo designs A vision to remember Primitive and Proper 733 Rook no 17 Home Stories A to Z Naptime Crafters Whipperberry delightful order blissful and domestic elizabeth and co diy by design gingersnap crafts>my repurposed life http://www.myrepurposedlife.com/http://www.remodelaholic.com

Wednesday, July 24, 2013

Star Wars Bedroom Reveal

The same week I worked on our daughter's princess room, I also finished our son's Star Wars room.  It was a lot of work, but I think it was so very worth it!  I'm really happy with how it turned out


The headboard is made up of the magnetic boards that used to be on my son's dresser.  You can buy them at IKEA.  We just put two of them on the wall, side by side.


We also used puck lights with magnets on the back of them (from Dollar tree), to make the headboard seem more like a control panel.  The green things are little glass "stones" from Dollar Tree that we glued magnets onto.  We wanted to give the effect of driving the Millenium Falcon.  Our son really loves playing with the lights at night and we read his bedtime stories by the light of the puck lights

We ended up adding a few more lights... these are LEDs that are attached to a button.  


Here is the button that controls the LEDs... I have no idea how my husband did this this, but I think it's awesome

We also put up a "light saber holder" (it's actually a broom/garden tool holder from Home Depot).  I originally saw the idea at Quite Contrary

I cut some white vinyl with my Silhouette to make the sign; the black and gray areas are painted

I also repainted what used to be the Spiderman trunk

Here is the sign on the outside of his door

and here is another mural; this one is the view from the gunner turret on the Millenium Falcon.  I chose the battle of Endor for the scene

Here is a detail

and no Star Wars mural is complete without the Death Star

Just like my daugter's room, it's totally over the top.  I figured we might as well do it up!

Do you have a little boy who's into Star Wars?  I was a little worried our son would be scared of the battle scenes, but he loves everything about the room.

Thanks so much for stopping by!
Blessings,
Jamie


This post is linked here:  Today's Creative Blog Blue Cricket Design Kurtz Corner Mommy by Day Crafter by Night Cherished Bliss Lines Across My Face Southern Lovely Bear Rabbit Bear French Country Cottage Craft Junkie Too DIY Home Sweet Home Saved by Love Domestically Speaking Funky Junk Interiors Homemaker on a Dime Eisy Morgan The Answer is Chocolate Making the World Cuter Craft-O-Maniac lolly jane 504 Main I Heart Naptime Singing Three Little Birds mad in crafts House of Hepworths Somewhat Simple Chic on a Shoestring Keeping it Simple Be Different Act Normal Sew Can Do Sew Chatty Pinkapotamus The Girl Creative Flamingo Toes Tatertots and Jello Sisters of the Wild West Reasons to Skip the Housework Giggles Glitz and Glam Tip JunkieThe Trendy Treehouse Ladybug Blessings Night Owl Crafting Tea Rose Home My Girlish Whims Allie Makes Gluesticks Thrifty 101 Momnivores Dilemma A Little Knick Knack Miss Mustard Seed Freckled Laundry kojo designs A vision to remember Primitive and Proper 733 Rook no 17 Home Stories A to Z Naptime Crafters Whipperberry delightful order blissful and domestic elizabeth and co diy by design gingersnap crafts>http://www.myrepurposedlife.com/http://www.remodelaholic.com

Friday, July 19, 2013

Little Girl Princess Bedroom Reveal

I am so happy to finally have the kids' rooms painted!  Every time I would go to work on a painting job the kids would ask when I was going to paint their rooms.  The mommy guilt was especially bad if I was going to paint a mural for another little girl or boy.

We decided to surprise the kids with new rooms.  Here is what we came up with for our little girl...

I know I know, it's a little over the top.  I told you, I had mommy guilt!  It all started with that blanket on the end of the bed.  I found it at Hobby Lobby for 50% off and the little lady fell in love with it.  She calls it her cheetah blanket and takes it everywhere.

I found pink sheets and leopard print sheets at Wal Mart... I sewed two of the pink sheets together to make the duvet cover and I used pillow cases for the fabric to make the border on the curtains and the cornice above the bed.


My husband built the cornice and I added all the decorative elements.  I found sheer curtains at Hobby Lobby for $3.50 a panel because they were 50% off.  It took four panels to get all that drapey-goodness!


I painted the crown headboard right on the wall and I used Martha Stewart Gold Metallic paint


There are actual little gems hot glued onto the wall... we are on day 6 and she hasn't picked one off yet!  Woot!


I changed out the polka dot fabric for the leopard sheet fabric... there is a tutorial here for how I originally made the curtains longer.


Here is another way I used the sheets.  The panel isn't exactly sewn onto the pillow yet, but you get the picture.  Girlie was horrified when the panel fell off the pillow when she went to get into bed the first night.


She loves flowers so I thought, "why not give her her own vase?"  The flower bunches were on clearance at Hobby Lobby for $.80 a piece!

The nightstand/bookshelf was from Goodwill and it was painted in the Martha Stewart Metallic paint.

And this simple little piece might be my favorite part of the room.

I just made the design in Illustrator and printed it out on our printer.  I spray painted an old frame to match the room.


This is on the outside of her door... I made it with the Silhouette and some adhesive vinyl.

Her favorite part of the room?  The bow holder!

And above the bow holder hangs this

What do you think?  Do you have a fierce one who'd like a room like this?  I'm hoping this will be something she'll like for years to come!

Thanks so much for stopping by!
Blessings,
Jamie

This post is linked here:  Today's Creative Blog Blue Cricket Design Kurtz Corner Mommy by Day Crafter by Night Cherished Bliss Lines Across My Face Southern Lovely Bear Rabbit Bear French Country Cottage Craft Junkie Too DIY Home Sweet Home Saved by Love Domestically Speaking Funky Junk Interiors Homemaker on a Dime Eisy Morgan The Answer is Chocolate Making the World Cuter Craft-O-Maniac lolly jane 504 Main I Heart Naptime Singing Three Little Birds mad in crafts House of Hepworths Somewhat Simple Chic on a Shoestring Keeping it Simple Be Different Act Normal Sew Can Do Sew Chatty Pinkapotamus The Girl Creative Flamingo Toes Tatertots and Jello Sisters of the Wild West Reasons to Skip the Housework Giggles Glitz and Glam Tip JunkieThe Trendy Treehouse Ladybug Blessings Night Owl Crafting Tea Rose Home My Girlish Whims Allie Makes Gluesticks Thrifty 101 Momnivores Dilemma A Little Knick Knack Miss Mustard Seed Freckled Laundry kojo designs A vision to remember Primitive and Proper 733 Rook no 17 Home Stories A to Z Naptime Crafters Whipperberry delightful order blissful and domestic elizabeth and co diy by design gingersnap crafts>my repurposed life

Monday, July 15, 2013

DIY Hair Clip Holder from a Picture Frame

I finished the kids' rooms!  In the next week or two I'll be posting about the various projects I worked on for each room.  Here is one of my favorite elements of my daughter's room...


I found some sheets at Wal Mart in the leopard print and I used it for most of the projects in the room.

Here is the before and after
The frame is something I found at a garage sale (two years ago) with the intention of doing this one day.  That is NOT a quick turn around, but hey, at least it's done now.

I took the frame apart by unscrewing it from the back.  I then placed a sheet of batting over the picture and particle board that made up the back of the frame

Then came the fabric layer

The fabric was cut to fit a little better


I then cris-crossed the pink gross grain ribbon to lay it out.  I used a little dab of hot glue at each of the intersections.  Then I turned it over and hot glued the heck out of all the layers to the back of the particle board.


Here's what the back looked like right before I went nuts with the glue gun.  I replaced the screws that held the back onto the frame at this point.


I also added these little gems from Hobby Lobby to give it a little sparkle.  What did I use to adhere them?  You guessed it!  Hot glue!


Here is it all done but without any bows or clips on it.

What do you think?  It was definitely a hit with the little one.  She is such a girlie girl... I seriously have no idea where she gets it!  I didn't have so much as a Barbie doll growing up.

Thanks so much for stopping by!
Blessings,
Jamie

This post is linked here:  Today's Creative Blog Blue Cricket Design Kurtz Corner Mommy by Day Crafter by Night Cherished Bliss Lines Across My Face Southern Lovely Bear Rabbit Bear French Country Cottage Craft Junkie Too DIY Home Sweet Home Saved by Love Domestically Speaking Funky Junk Interiors Homemaker on a Dime Eisy Morgan The Answer is Chocolate Making the World Cuter Craft-O-Maniac lolly jane 504 Main I Heart Naptime Singing Three Little Birds mad in crafts House of Hepworths Somewhat Simple Chic on a Shoestring Keeping it Simple Be Different Act Normal Sew Can Do Sew Chatty Pinkapotamus The Girl Creative Flamingo Toes Tatertots and Jello Sisters of the Wild West Reasons to Skip the Housework Giggles Glitz and Glam Tip JunkieThe Trendy Treehouse Ladybug Blessings Night Owl Crafting Tea Rose Home My Girlish Whims Allie Makes Gluesticks Thrifty 101 Momnivores Dilemma A Little Knick Knack Miss Mustard Seed Freckled Laundry kojo designs A vision to remember Primitive and Proper 733 Rook no 17 Home Stories A to Z Naptime Crafters Whipperberry delightful order blissful and domestic elizabeth and co diy by design gingersnap crafts>my repurposed life
Related Posts Plugin for WordPress, Blogger...