Tuesday, January 10, 2012

Skirted Bar Stool


I have been looking for bar stools for our kitchen for almost 5 years now... I finally found some at Goodwill for $6 a piece!
They were green, but the perfect height.  I took them.

Our kitchen is teeny so I wanted something that would tuck away completely and almost hide when we had them pushed in. Or so I thought. I spray painted the legs gray, did another coat in white, and then sanded them to distress them. But they were just TOO plain.

If I'm having a bad day or I just feel kind of gross I put a skirt or a dress on.  I don't know what it is, there's just something about a skirt that makes me feel a little more special.  I think you see where I'm going with this...  Little wallflower bar stools, I'm about to upgrade you.

And here they are in all their knife-pleated glory (this was my first attempt at knife pleats, so I'm a little excited)

I love them.  I named them Nellie 1 and Nellie 2.  Let's be honest, they look a little like the Nellie Olesons of bar stools
source

I've had this fabric for a while... I bought it at IKEA in the "you know there's something majorly wrong with this thing we're trying to sell so we'll make it really cheap" room.  They were $3.99 curtains that had some holes in them, but I loved the color and texture so I bought them.

I made some piping in white canvas.

Then I pinned the top part of the slipcover inside-out on the bar stool and sewed it, using my zipper foot.
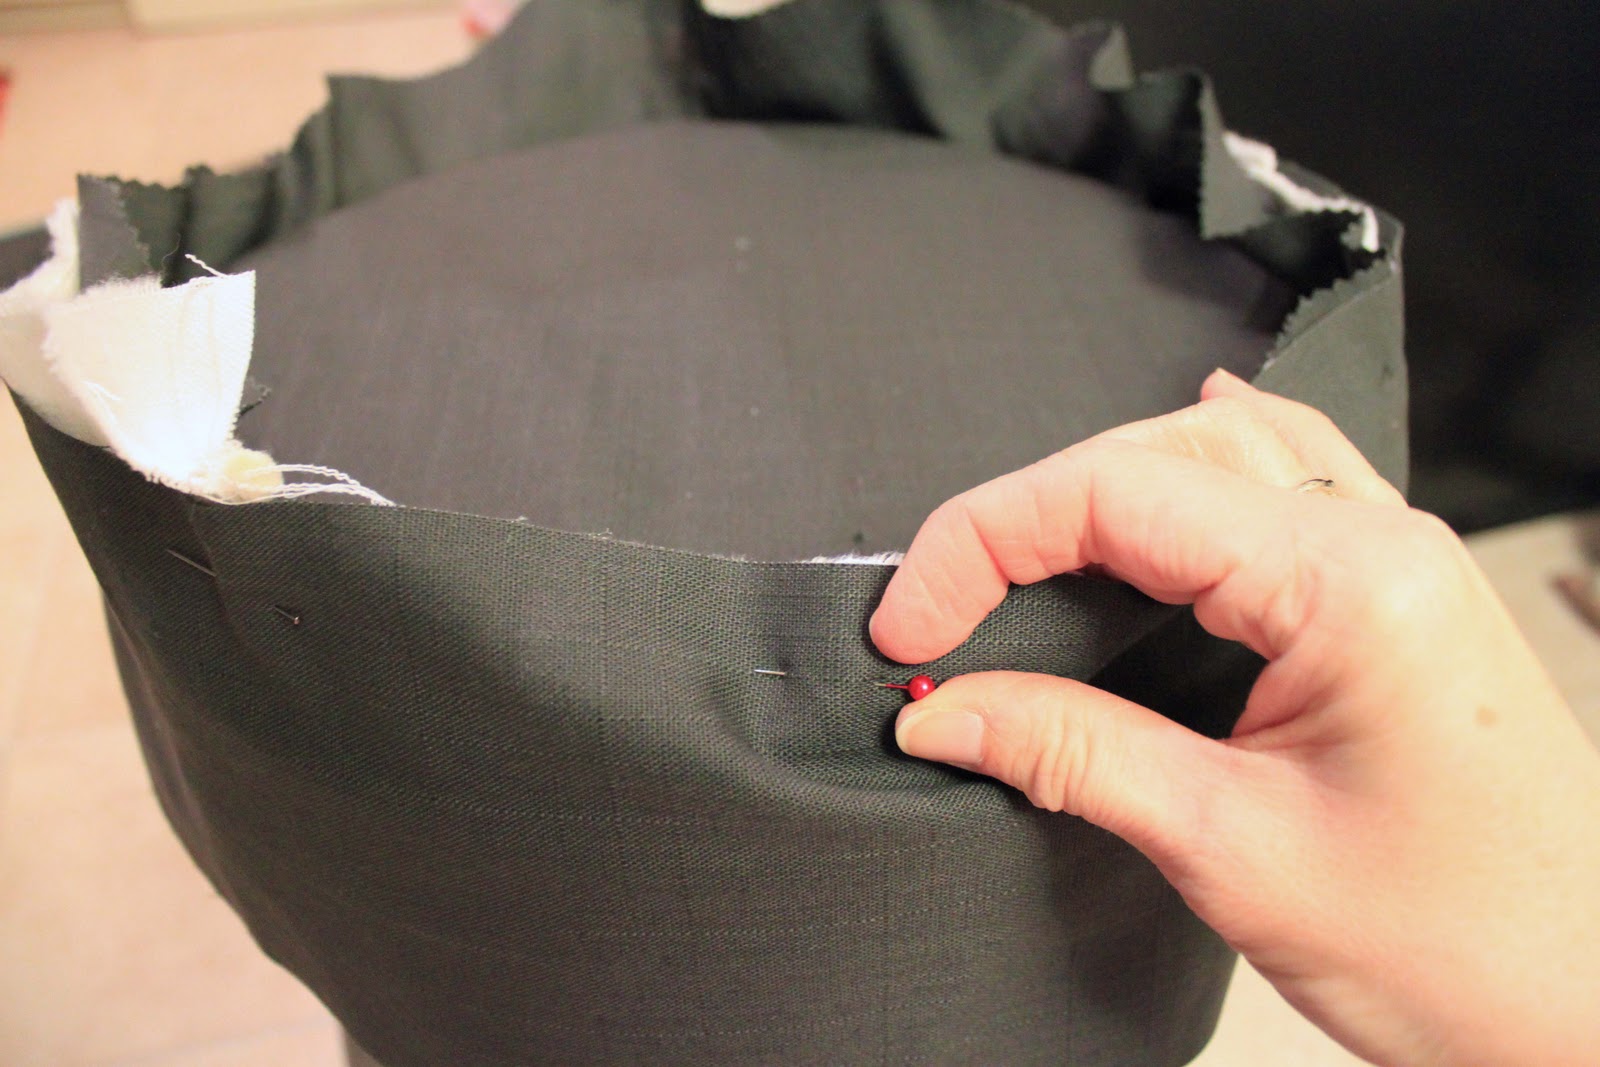
I ironed the pleats into the fabric, using a piece of cardstock (it was actually a coupon) as a template.

Then I pinned the piping and skirt onto the main piece and sewed it with the zipper foot.

I thought I had sworn off the zipper foot and any kind of piping or welting after sewing the slipcover for my sectional.  I guess it's been long enough since that project that I forgot how much I struggled with it.  These "slipcovers" were actually a lot easier.

I'm loving my "new" bar stools!  Let me know what you think...
Blessings,
Jamie
Pin It


This post is featured here
homemade crafts         


This post is linked here:  Today's Creative Blog Blue Cricket Design Kurtz Corner Mommy by Day Crafter by Night Cherished Bliss Lines Across My Face Southern Lovely Bear Rabbit Bear French Country Cottage Craft Junkie Too DIY Home Sweet Home Saved by Love Domestically Speaking Funky Junk Interiors Homemaker on a Dime Eisy Morgan The Answer is Chocolate Making the World Cuter Craft-O-Maniac lolly jane 504 Main I Heart Naptime Singing Three Little Birds mad in crafts House of Hepworths Somewhat Simple Chic on a Shoestring Keeping it Simple Be Different Act Normal Sew Can Do Sew Chatty Pinkapotamus The Girl Creative Flamingo Toes Tatertots and Jello Sisters of the Wild West Reasons to Skip the Housework Giggles Glitz and Glam Tip JunkieThe Trendy Treehouse Ladybug Blessings Night Owl Crafting Tea Rose Home My Girlish Whims Allie Makes Gluesticks Thrifty 101 Momnivores Dilemma A Little Knick Knack Miss Mustard Seed Freckled Laundry kojo designs A vision to remember Primitive and Proper 733 Rook no 17 Home Stories A to Z Naptime Crafters Whipperberry delightful order blissful and domestic elizabeth and co diy by design gingersnap crafts

Sunday, January 08, 2012

Quick Gifts: Etched Glass Baking Dish


My sister's mother-in-law buys our children the most thoughtful gifts for Christmas every year. The only problem: I almost always forget to get her something! Well, this year was going to be different. I came to North Carolina armed with my Silhouette and some etching cream.


Sue (or Seuss as we like to call her) is a wonderful baker, so I decided to make her a baking pan with her name on it.

I often get so frustrated when I leave a pan somewhere (and I can't remember where) or some anonymous person leaves a pan at my house.  Anonymity no more for Seuss when she brings a baked good to a friend!

This was my first try etching on glass and I loved it!  I started with my design in Silhouette and flipped it horizantally.
I cut it and weeded out the centers of the letters and put the contact paper on the glass pan.  Above is the view from the back of the pan.  Below is the view from the front
Then I applied a thick layer of the etching cream with a paint brush.

source: armourproducts.com

I washed the etching cream off after 5 minutes and peeled away the vinyl. Voila!

I still can't believe it worked.

I also made a glass for our neighbor who brews his own beer. He stops by with free beer for us periodically (thanks Joe!)
I'll be doing many more of these projects in the future... I think they make great gifts!  What do you think?

Blessings,
Jamie
Pin It


This post was featured here
The Girl Creative
This post is linked here:  Today's Creative Blog Blue Cricket Design Kurtz Corner Mommy by Day Crafter by Night Cherished Bliss Lines Across My Face Southern Lovely Bear Rabbit Bear French Country Cottage Craft Junkie Too DIY Home Sweet Home Saved by Love Domestically Speaking Funky Junk Interiors Homemaker on a Dime Eisy Morgan The Answer is Chocolate Making the World Cuter Craft-O-Maniac lolly jane 504 Main I Heart Naptime Singing Three Little Birds mad in crafts House of Hepworths Somewhat Simple Chic on a Shoestring Keeping it Simple Be Different Act Normal Sew Can Do Sew Chatty Pinkapotamus The Girl Creative Flamingo Toes Tatertots and Jello Sisters of the Wild West Reasons to Skip the Housework Giggles Glitz and Glam Tip JunkieThe Trendy Treehouse Ladybug Blessings Night Owl Crafting Tea Rose Home My Girlish Whims Allie Makes Gluesticks Thrifty 101 Momnivores Dilemma A Little Knick Knack Miss Mustard Seed Freckled Laundry kojo designs A vision to remember Primitive and Proper 733 Rook no 17 Home Stories A to Z
Naptime Crafters Whipperberry delightful order blissful and domesticcozy home scenes

Tuesday, January 03, 2012

Craft Storage and DIY Pinboard Tutorial

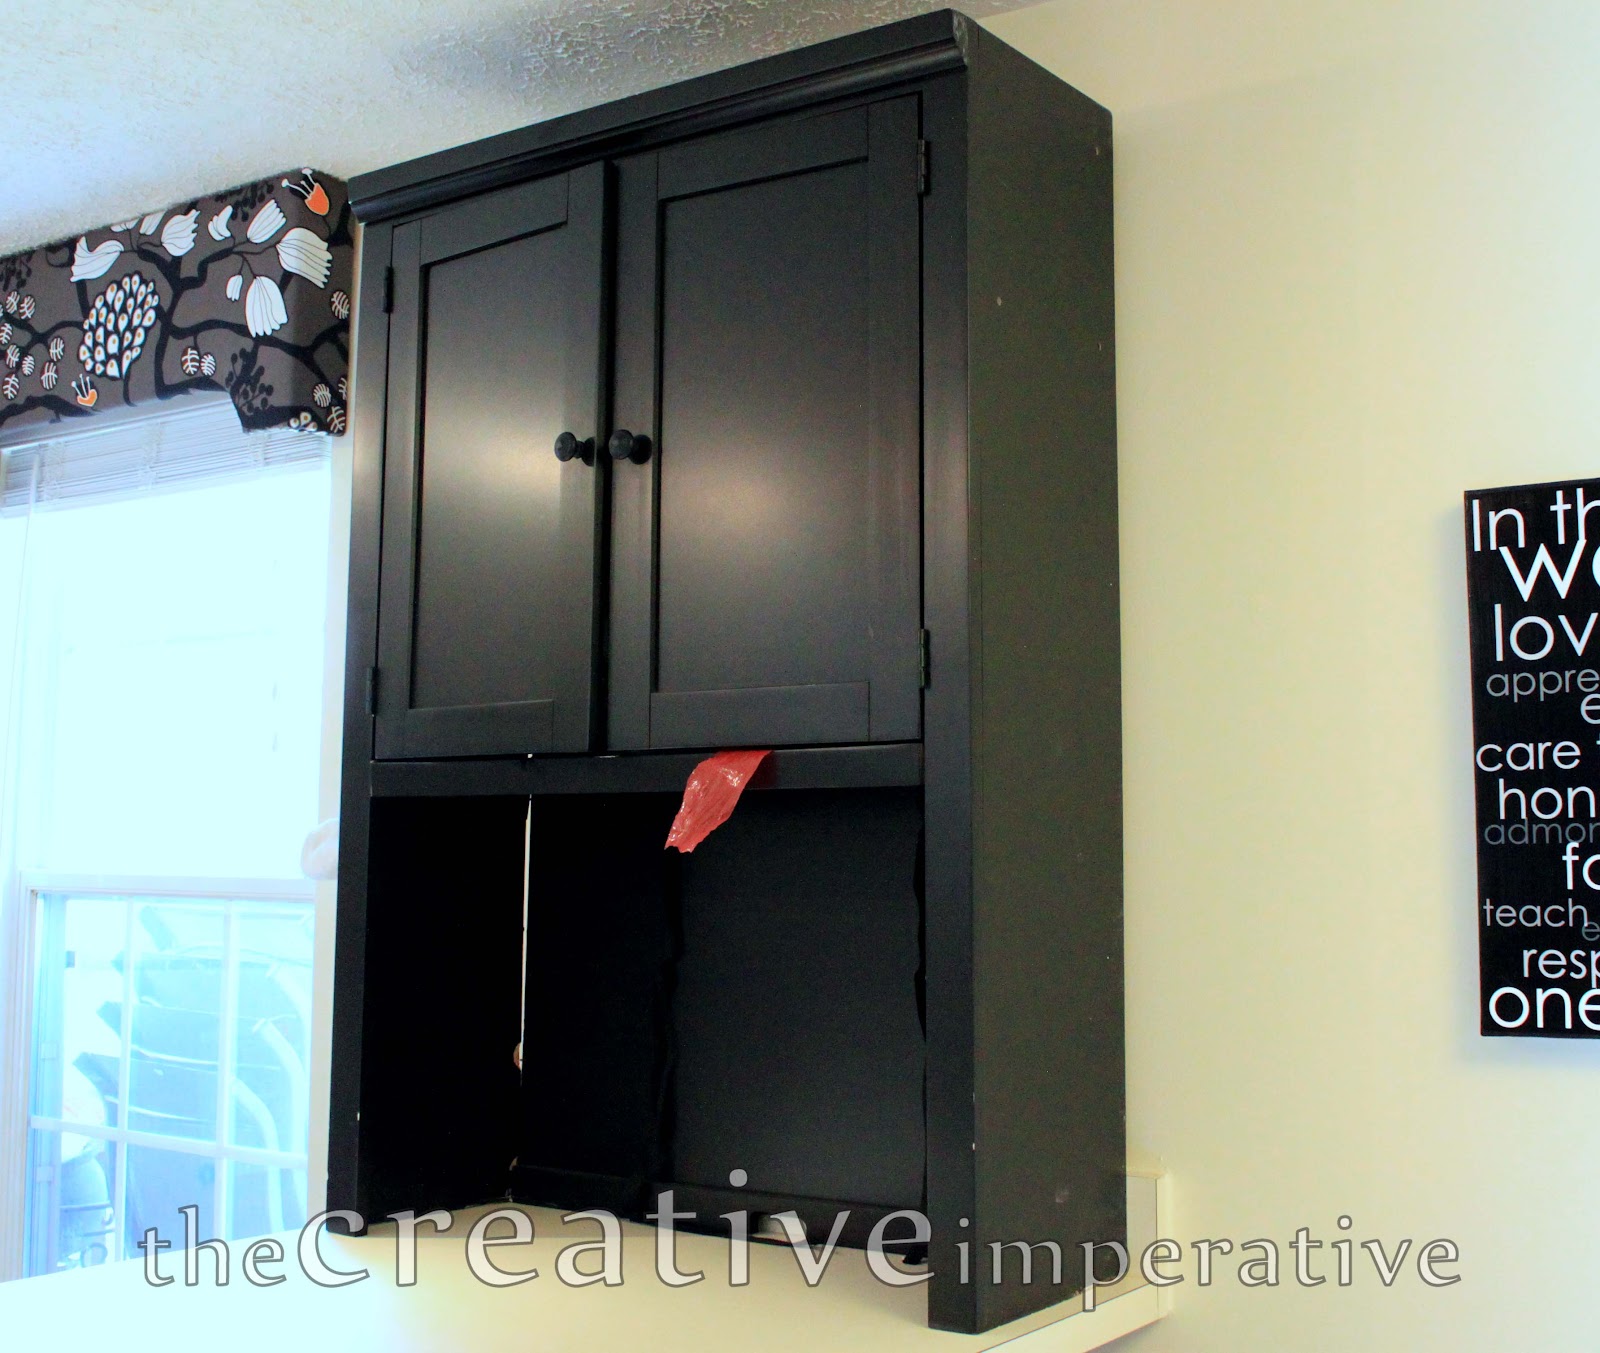
I really wanted open shelving in my kitchen, but honestly, that just isn't practical for my lifestyle.  I need some doors, people!  I want to be able to hide my mess behind something opaque and I don't want you looking at it.  Here is what I ended up with

and this is the "before" of the peninsula in the kitchen
wasted wall space, I tell you!
I found this black cabinet thing at Goodwill for $25 before Christmas.  Mr. Creative Imperative knows when something comes home from Goodwill, it usually means more work for him.  Yep!
So it needed major a few repairs. Sweet husband!


 We still have no idea what this was in it's former life.  I think it was part of an entertainment console (there was a partner at the thrift store, but they were being sold separately).
To give you a little background, this room is my kitchen/dining room/craft room/home office.  There is hardly enough room for the 4 of us to sit and eat dinner in this room so space is at a premium.  When I pull out my crafting stuff or have etsy orders to fill, it disrupts the entire house.  I'm really praying this hideaway for crafting materials will provide a little sanity for 2012.
Now let's see if I can keep it organized (it isn't even all filled up yet).  If I don't, you'll never know because I simply closed the cabinet doors.

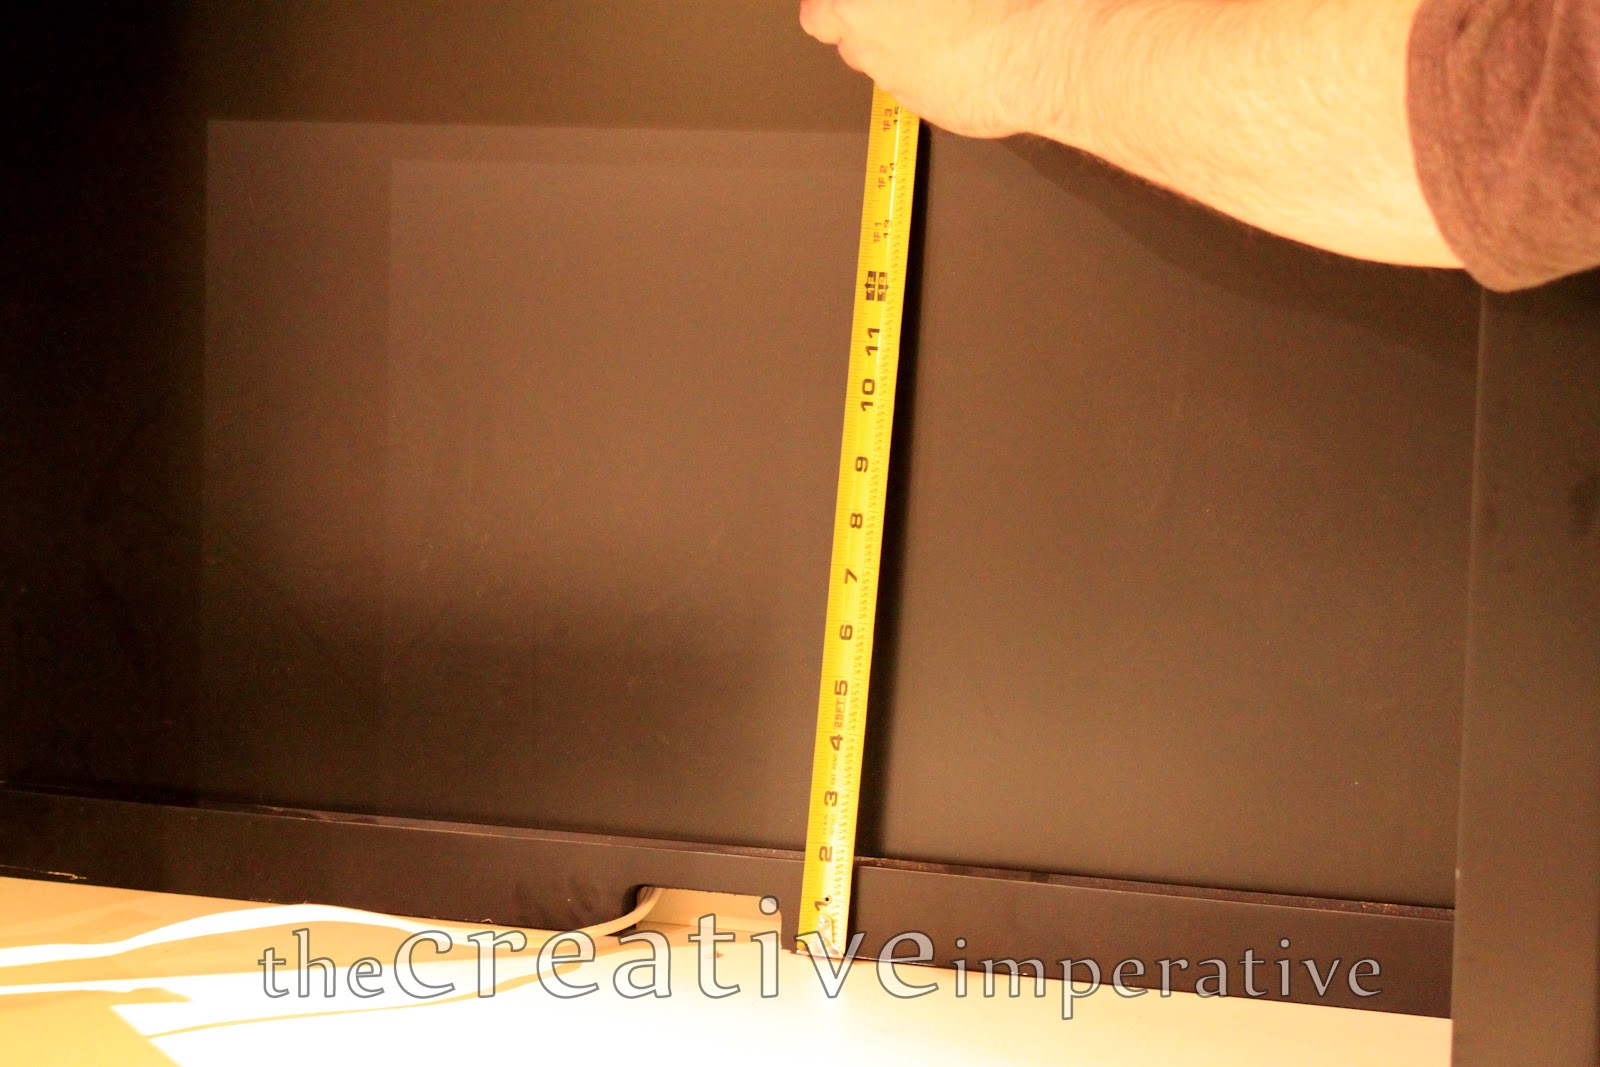
I'm still searching for the perfect way to display important papers, so I decided to make a pinboard for lower area of the structure.  Cork was on sale at Hobby Lobby, but it was still way too expensive for me.  So I used foam board (also known as foamcore)

1)  Measure

2)  Cut a piece of foam board to fit

3)  Cut fabric about 4" bigger than foam board (2" on each side)

4)  Hot glue fabric to foam board (wrapped around and glued on back)

5)  Glue sock to floor

Step 5 is optional.

I didn't even secure the pinboard to the back of the cabinet;  it's just being held up by the stuff in front of it.  Speaking of not securing things... we didn't mount the cabinet above the piece of countertop trim.  We just let it sit on the counter and used an L bracket on top of it to hold it to the wall.  If we want to sell the house, we didn't want it to be a pain to take the whole thing down.  I'm trying to decide if this thing is a selling point or if it makes the kitchen look smaller.
Thanks for stopping by!  Have you come up with any organization solutions to help you in 2012?  Let me know in the comments!
Blessings,
Jamie
Pin It

This post is featured here:
Creative DIYers Club

This post is linked here:  Today's Creative Blog Blue Cricket Design Kurtz Corner Mommy by Day Crafter by Night Cherished Bliss Lines Across My Face Southern Lovely Bear Rabbit Bear French Country Cottage Craft Junkie Too DIY Home Sweet Home Saved by Love Domestically Speaking Funky Junk Interiors Homemaker on a Dime Eisy Morgan The Answer is Chocolate Making the World Cuter Craft-O-Maniac lolly jane 504 Main I Heart Naptime Singing Three Little Birds mad in crafts House of Hepworths Somewhat Simple Chic on a Shoestring Keeping it Simple Be Different Act Normal Sew Can Do Sew Chatty Pinkapotamus The Girl Creative Flamingo Toes Tatertots and Jello Sisters of the Wild West Reasons to Skip the Housework Giggles Glitz and Glam Tip JunkieThe Trendy Treehouse Ladybug Blessings Night Owl Crafting Tea Rose Home My Girlish Whims Allie Makes Gluesticks Thrifty 101 Momnivores Dilemma A Little Knick Knack Miss Mustard Seed Freckled Laundry kojo designs A vision to remember Primitive and Proper 733 Rook no 17 Home Stories A to Z
Naptime Crafters Whipperberry delightful order cozy home scenes
Related Posts Plugin for WordPress, Blogger...