Showing posts with label little girl gift. Show all posts

Thursday, March 01, 2012

St. Patrick's Day Leg Warmers

My friend, Alyssa from Hands Always Creating, showed me some adorable baby leg warmers she made for her daughter... I fell in love with them!  Alyssa was telling me how easy it was so I couldn't wait to try to make a pair for my little girl...

Just in time for St. Patrick's Day

And they were so easy!  There's a good, detailed tutorial here.

I found these socks at the Forever 21 accessory store

I cut them

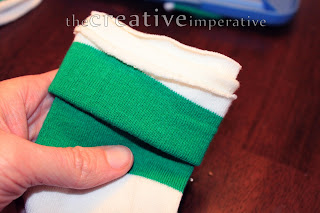
and then used the middle part of the foot to make a cuff


I pinned it and sewed it to the main part of the legwarmer

and then ended up with this!

I think she likes them... she didn't want to take them off!

Looks like someone's ready to march in the St. Patrick's Day parade.

Thanks so much for stopping by!
Blessings,
Jamie

Featured here
This post is linked here:  Today's Creative Blog Blue Cricket Design Kurtz Corner Mommy by Day Crafter by Night Cherished Bliss Lines Across My Face Southern Lovely Bear Rabbit Bear French Country Cottage Craft Junkie Too DIY Home Sweet Home Saved by Love Domestically Speaking Funky Junk Interiors Homemaker on a Dime Eisy Morgan The Answer is Chocolate Making the World Cuter Craft-O-Maniac lolly jane 504 Main I Heart Naptime Singing Three Little Birds mad in crafts House of Hepworths Somewhat Simple Chic on a Shoestring Keeping it Simple Be Different Act Normal Sew Can Do Sew Chatty Pinkapotamus The Girl Creative Flamingo Toes Tatertots and Jello Sisters of the Wild West Reasons to Skip the Housework Giggles Glitz and Glam Tip JunkieThe Trendy Treehouse Ladybug Blessings Night Owl Crafting Tea Rose Home My Girlish Whims Allie Makes Gluesticks Thrifty 101 Momnivores Dilemma A Little Knick Knack Miss Mustard Seed Freckled Laundry kojo designs A vision to remember Primitive and Proper 733 Rook no 17 Home Stories A to Z Naptime Crafters Whipperberry delightful order blissful and domestic elizabeth and co diy by design gingersnap crafts>my repurposed life

Monday, September 12, 2011

What Goes with a Tutu? A Princess Wand!

I've been giving tutus as birthday gifts to preschool-aged girls lately, but it just didn't seem like enough.  A few weeks ago it hit me:  a princessy scepter wand thingy!  Girls don't care what it's called, but they love it.
My daughter is the model for this one.  She is a tiny 1 1/2 year old and the recipient was a 3 year old so it's a little big on her.  And yes, that's a bathing suit shirt.  We were going to a pool party.

We'll start with the wand.

Remember the ribbon holder?  We'll be using some of the dowels from that project.

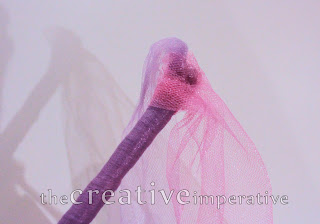
Get a roll of tulle to wrap around the dowel.  Start with a dab of hot glue to hold it in place

then start wrapping
put a few dabs of glue along the way as you're wrapping, just to be sure it stays in place.  Wrap all the way to the end.

When you get to the end, tie the tulle in a knot and glue it well.  Leave a train of tulle whatever length you desire.

Tie and glue a few more pieces of tulle and/or ribbon to the end.

My daughter ripped a little decorative fabric crown off one of her dress up outfits that day... it was perfect for this!

I glued it on to cover up where the ribbons were tied

I'm pretty sure you don't have a shimmery fabric crown lying around.  Get creative!  You can use beads, an applique, whatever you want.

Here's how I did the tutu if you're curious.  I'll keep it quick in case you're bored already

Sew a loop of elastic the size of the girl's waist (or you can use a stretchy headband).

Cut equal lengths of tulle (you'll need about 2-3 rolls, depending on how long and full you'd like your tutu) about 3 feet long.  I cut both rolls at once to make it go faster

Take each of these and fold it in half

Start tying them to the elastic by sending the ends through the loop like this
Pull tight.

You can tie the tulle pieces in a a regular knot, but doing it this way helps them lay better.  Keep tying them and pushing the tied pieces of tulle close together so the tutu ends up nice and full.  You're going to use more tulle than you think!  I can't give you an exact amount of tulle pieces because every tutu I've made has been different.  I also tied some pieces of ribbon into the tutu to add a little more color.

I heard the girl who received this tutu wouldn't take it off and wanted to wear it to bed.  Now that's a successful gift!  Here's one more pic of my girlie wearing it

This is such a great solution for an inexpensive girl gift.  Now, if I could just find something as easy to make for boys...

Let me know if you have any favorite go-to gifts!
Blessings,
Jamie
Pin It

This post is featured here:
Featured on Pinkapotamus

Tuesday, August 30, 2011

Ruffly Crayon Apron Tutorial

I made this for my bestie's little girl last week

I am going to attempt to tell you how I did it.  In the interest of full disclosure:  I have no idea what I'm doing when it comes to sewing and this is not going to be a very technical tutorial.  I don't know how to read a pattern or how to use half the functions on my very simple sewing machine.  I don't know all the lingo so just bear with me; I will use the word "topstitch" because it is the one word I understand and it makes me feel cool to say it.

Here we go.

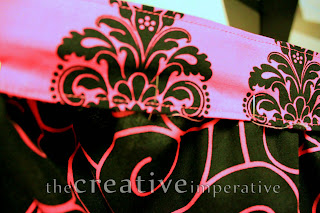
Get some fun fabrics
I obviously didn't end up using that pink leopard fabric, but isn't it cute?

Prewash your fabric and cut it into the following pieces:
Waistband:  4.5" x 42"
Body:  8.5" x 16"
Ruffle:  4.5" x 42"
Crayon pocket:  5" x 16"
*These dimensions don't have to be exact!  You're going to want the crayon pocket width to match up with the body of the apron, so those are those are the only two that should be close.  This apron fits a 2-4 year old.*
 
I started with the waistband because I knew it would be easy.  Sew it into a "tube" inside out with between 1/4" - 1/2" seam allowance.  Oh, I guess I know what a seam allowance is.  Yay!
here I am pinning it
and sewing it
then turn it rightside out!
Tuck the ends in, pin them and sew them closed
Then topstich all the edges

Then you'll have your waistband!

Now let's start the body.  Hem the sides about 1/2"

Decide which side is the top and which is the bottom.  
Hem the bottom about 1/2"
Bunch the top so it is ruffly.  There is a quick tutorial for how to do this here.  There are plenty of tutorials on youtube for gathers and ruffles if you don't like the one I linked to.
I gathered it down to about 10" across at the top
Now center the body on the waistband, pin it generously and sew it!
  
Here's what you should have now

You still with me?  Good.  Next we'll do the bottom ruffle since we're so darn good at gathers now.
I wish I had more pics of this part; it was really late and I was tired.

Fold the bottom ruffle piece of fabric lengthwise, wrong sides together (rightside out).  Make a super bunchy gather close to the raw edge.  You are going to be bunching it down from 42" to about 15" (so it will match up with the hemmed body).  Measure it against the hemmed body to be sure your width is correct.  Sew the ruffle to the bottom of the body.

Now you should have this.  We're getting there...

Now it's time to sew the crayon holder.
Make another inside out "tube" like you did for the waistband.  Turn it rightside out and topstitch.  Told you I'd say topstitch a lot.

Tuck in the edges and sew them so you have this.  ***Make sure that the length of the crayon holder part is the same as the width of the body.  Adjust your seams to match the two***
You can see my prototype on the floor in the background.  I experimented with one and gave it to my daughter.

Now we get to attach the crayon pocket to the rest of the apron.  Pin it down near the ruffle, matching the pocket hem to the body hem, and sew around the sides and bottom.  ***leave the top open so there is a place to slip the crayons in***

Now it's time to mark where the stitches for the crayon compartments will go.  I made them about an inch apart
Sew each line that will be the sides of the individual crayon pockets.  Sew the entire height of the pocket for each line.  You'll be making about 15 of these.  Make sure you backstitch!
Sick of sewing yet?  This is where I start to get bored.  We're so close to being done!
Now you'll have this
and lots of these

Trim all those ugly strings!

Stick some crayons in the pockets and you're done!!!

What do you think?  Let me know if you try it!  It will take a couple of hours to do, but I think this is so worth it.  Thanks for stopping by!

Blessings,
Jamie
Pin It

This post has been featured here
Related Posts Plugin for WordPress, Blogger...